How Do You Remove the EZGo Driven Clutch? [7 Easy Steps]
A good golf cart will give you hours of fun and adventure. They’re made not just for golfers but for everyday people wanting to cruise around and enjoy scenic views. And like any other vehicle in the world, you’ll need regular maintenance.
One of the vital components of your golf cart is the driven clutch. This large, powerful component distributes power throughout the entire vehicle, providing you with a comfortable ride.
If you’re reading this, you own an E-Z-GO Golf Cart and need to remove the driven clutch. Well, you’re in luck. In this article, we’ll go through the step-by-step process to remove the clutch & make it a breezing experience.

How does Clutch System work On The E-Z-GO Golf Cart?
Your E-Z-Go cart engine maintains a constant RPM. Meaning, it always runs at the same speed.
Still, you can easily accelerate or decelerate without thinking about what’s going on. The clutch system is called the Continuously Variable Transmission or CVT method.
Two separate pulleys – Drive and Driven Clutch – are connected together by a belt to seamlessly shift gears.
As the pulley changes diameter, the belt adjusts in size, changing the gear ratio and allowing for infinite gear ratios between the highest and lowest ratios.
The Distinction Between the Drive and the Driven Components
Drive, which is the primary clutch, is the source of rotations and transmissions. At first, the drive is turned on to cause energy transmission within the engine. It provides the transmitted energy to the driver.
The driven, aka. The secondary clutch is connected to the drive and has some number of teeth.
The drive creates power, transmits it to the driven, and causes mutual rotations for the cart’s acceleration and deceleration.
Lastly the drive belt connects the two pulleys and transfers torque in between them. The pulleys change in diameter by sensing the load transferred by the drive belt.
Why do you need to remove the E-Z-GO Driven Clutch?
You’re driving smoothly on a flat course, but a slight uphill terrain slows you down. The cart can’t deliver the needed power.
There’s a plastic button in the driven clutch attached to the inclined metal ramp. This button pushes the clutches and transfers power.
Now, the absence of a button results in zero-push. The two metal ramps slide over without friction.
That’s why there’s no change in speed. Let’s look at some symptoms that will open your eyes to taking a look at the clutch box:
- You can’t smoothly transition between gears. Hard to slow down or speed up.
- Like an angry horse, your cart suddenly jumps in speed and experiences a sharp fall in speed.
- You can barely start, brake or drive without hearing some cracky noise in the back.
Tools Needed
No one goes to war without their weapons, right? It goes on to select the right weapons. Changing your driven clutch is no different. There’s no way you’ll accomplish your mission without the right tools. Here they are:
- Clutch Puller: To remove the press-fitted clutch into the engine shaft.
- Rubber Hammer: Real hammer destroys the Aluminum-made clutch.
- Machine Oil: Putting some oil over rusty teeth for easy removal.
- Air Gun: It’s basically an electric screwdriver to unscrew the bolts.
- Prybar: To transfer force into the spline in the driven clutch.
Step-by-Step Removal Guide for an E-Z-GO Driven Clutch
If you have confidence, a bit of necessary skill and the right tools mentioned earlier, you can try removing the E-Z-Go Driven Clutch. On the other hand, let the job be handled by a professional mechanic.
Step 1: Set The Park Brake
If you don’t want your cart to accidentally start moving and cause severe injuries while you’re conducting the following operations, the first thing is to put the cart on brakes and place the direction selector in ‘Forward’. This will make the cart immobile.
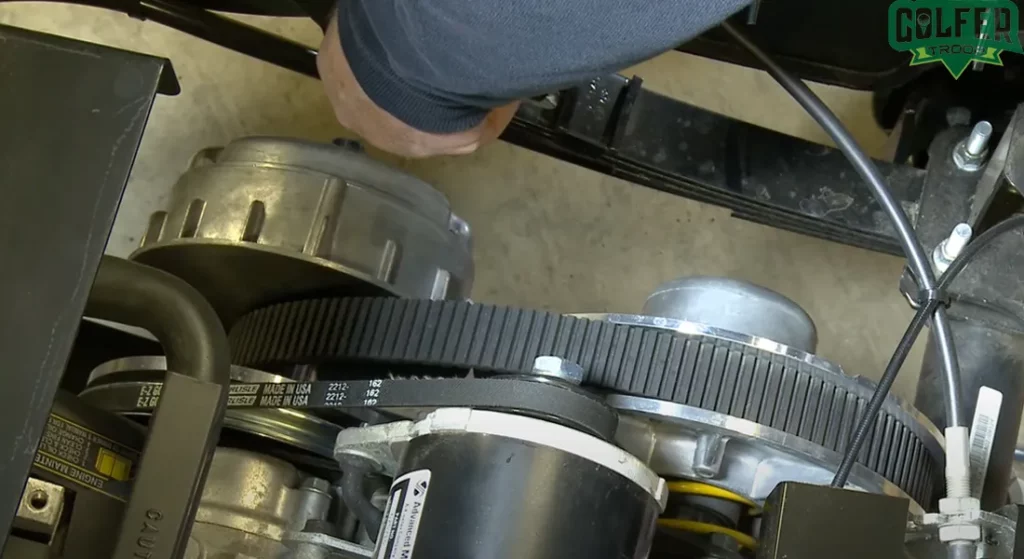
Step 2: Identify the Driven Clutch first
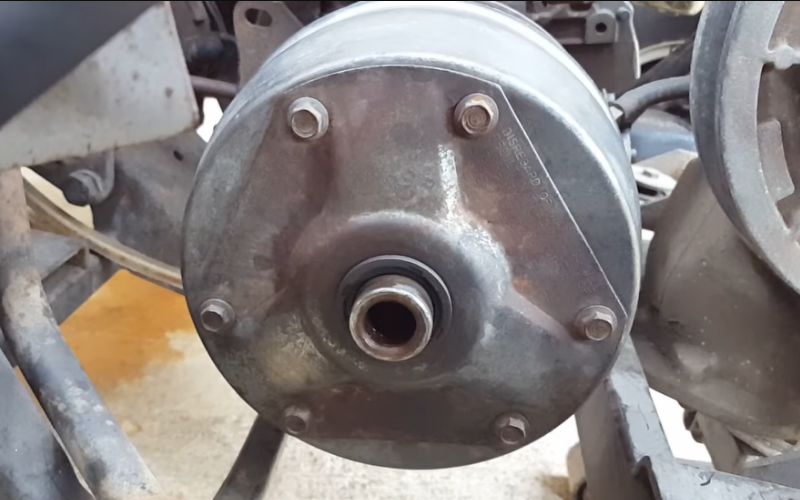
Look at the clutch compartment. It’s generally the lower one. A compact, cylindrical unit mounted directly on the transaxle.
Consult your owner’s manual as every model comes with its variation. You will see a belt used to connect it to the drive clutch.
Step 3: Remove the Belt
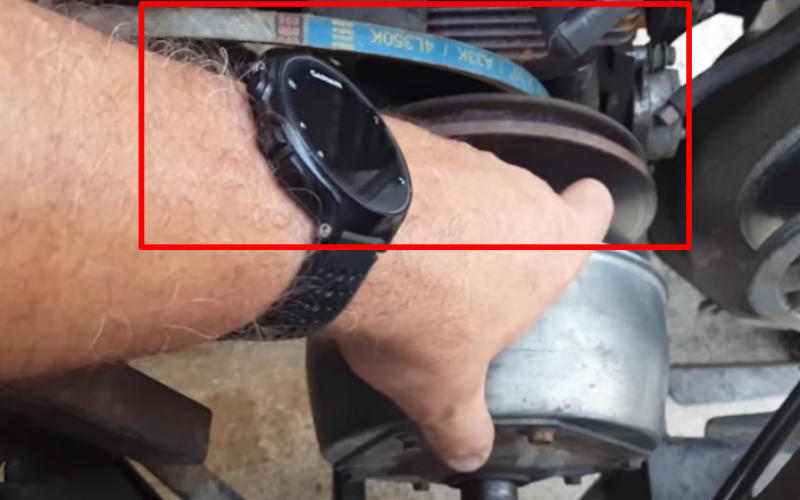
The belt keeps the system in cohesion. With the vehicle on stable ground level, pull the belt upwards to remove the drive belt. It causes the driven clutch sheaves to open and loosen the belt tension.
Step 4: Spray it with Machine Oil
Put enough liquid over the rusty joints and let it sit for a few hours. Machine oil acts as a lubricant, which reduces friction, making it easier to separate parts stuck together due to corrosion or oxidation.
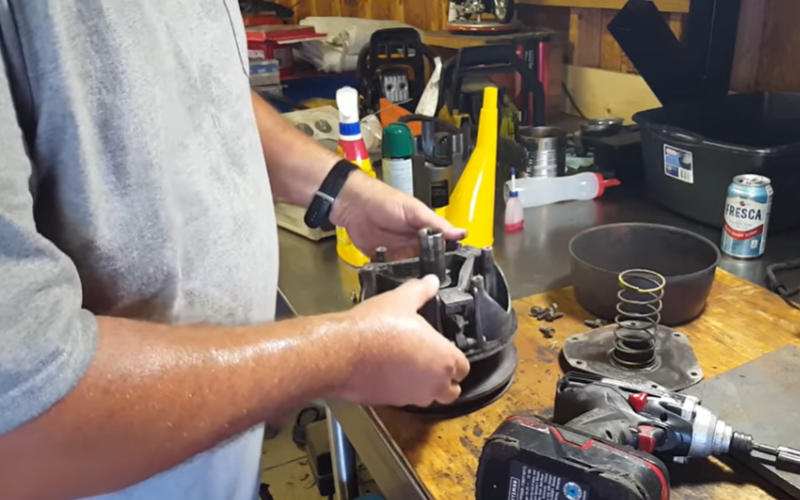
Step 5: Use the Clutch Puller to Pop the Driven Clutch
Access the driven clutch by removing the bolt and washer first. Mount the clutch puller onto the clutch.
Turn the puller’s center bolt with the air gun or a wrench to apply pressure to the clutch. The clutch should pop out; if not, jump to the next step.
Step 6: Hammer the Driven Clutch with Rubber Mallet
Use the rubber mallet close to the spline to see if the clutch moves. Patience is the best tool here, with a lot of machine oil.
Give it a little time, and it will come right off—a couple of hours to two days. People even reported taking a full good week for the clutch to pop out.
Step 7: Install The NEW Driven Clutch
By now, you should’ve removed the old faulty driven clutch. But before putting on that new clutch, clean the area and add some lubricants to it. Then put the new clutch in, turn the bolts tight, and reinstall the belt.
Expert Tips on E-Z-GO Driven Clutch Removal
Do not hesitate to gather the right tools. Sure, forcing the driven clutch with a pry bar will get that out. But it will be difficult to install a new one because of the prybar damage.
Keep in mind that the clutch housing is made of cast aluminum. It won’t sustain a single stroke of real hammer abuse.
Most often, people reported it takes a day or two for the clutch to pop open. Soak it well every day in the bolt hole and on the back side where it’s on the shaft.
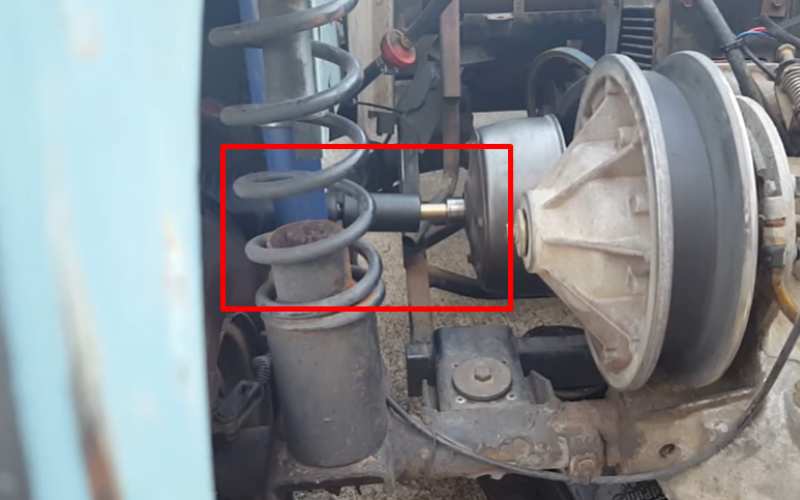
You can get a three-jaw puller on the clutch if you remove the driver-side rear wheel. Makes the job easier. Make sure it’s properly aligned with the clutch.
Frequently Asked Questions
Now that you know how to tackle the removal procedure, why don’t you get your hands dirty? Save this guide for the future because you’ll need it. Here are a bunch of common questions that get asked on the subject.
How Do I Know Which Clutch is Bad, Primary or Secondary?
If the primary clutch is bad, then the cart will not move no matter how much you increase the engine RPM. If the driven clutch isn’t engaging, your cart won’t accelerate or decelerate unevenly.
The bolt that holds the secondary clutch keeps breaking, Why?
It could be due to several reasons. Selecting an improper bolt won’t be able to withstand the stress or torque of the clutch, or excessive stress due to over-tightening will result in breaking the bolt.
Do I spray in between the two sheaves as well?
Spraying between the sheaves won’t get in there, but spreads around in the bolt hole and around the back, where it slides onto the differential output shaft. Always use temperature-resistant lubes.
What are Some Good Machine Oils out There?
It depends on your preference and what you have in your local store. Some commonly used products are PB Blasters, Liquid Wrench, Q20, and WD-40. Some people even reported using ice-cold beer!
Can I remove the driven clutch without a clutch puller?
Some people might have removed the driven clutch without a puller, but it’s risky. So, it’s not recommended. Again, the clutch is press-fitted. Trying to ‘remove’ it can permanently damage the housing.
Conclusion
Removing the driven clutch isn’t too complicated. But the key element is your patience.
You might have the right tools, but using any of them wrongly will result in catastrophic damage. Follow the instructions written in your manual.
But if you find it too complicated or don’t have the right tools, don’t hesitate to consult a seasoned mechanic.
This process requires attention to detail and a certain level of mechanical knowledge. We’ve laid out the minimum of what you need to know.
Let’s finish with a pro tip. Don’t assume you’re Dominic Toretto working on a supercar.
Vehicle mechanics follow the laws of physics, not cinemas. Messing up with a screw socket can cost you thousands.
- Read Also: How to Fix EZGo RXV Motor Brake Problems? [Easy Solution]
- Read Also: How to Fix EZGo Golf Cart Charging Problems? [Easy Fixes]
- Read Also: What Are the Most Common Issues With EZGo Gas Golf Carts?
- Read Also: EZGo Golf Cart Carburetor Adjustment: A Step-By-Step Guide
- Read Also: EZ Go Golf Cart Fuse Box Location [Fix a Blown Fuse]
Meet Jalal, a passionate golf writer and the driving force behind Golfertroop.com, your go-to destination for all things golfing! Whether you’re a seasoned golfing veteran or a beginner taking your first swing, Jalal is here to assist you in making the most out of your golfing experience.

![Why Are Blades Harder To Hit [Know The Real Fact!]](https://www.golfertroop.com/wp-content/uploads/2023/05/Why-Are-Blades-Harder-To-Hit-768x419.png)